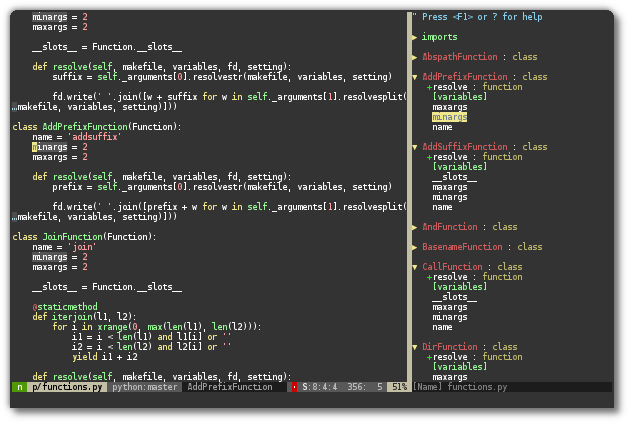
使用经典Vim配置方案vimrc,在此基础上定制。
1. 安装vimrc
The ultimate Vim configuration (vimrc)是一个经典Vim配置方案,为Ubuntu所有用户配置,方法如下:
$ sudo git clone --depth=1 https://github.com/amix/vimrc.git /opt/vim_runtime

sudo sh /opt/vim_runtime/install_awesome_parameterized.sh /opt/vim_runtime --all
注:如果是用CentOS,需要安装git,命令sudo yum install git。
如果需要额外添加配置,可以在文件/opt/vim_runtime/my_configs.vim添加,也可以在Vim全局配置文件/etc/vimrc上添加。
我的my_configs.vim内容如下:
$ cat my_configs.vim
" Basic config
set number
set numberwidth=1
au FileType * set fo-=c fo-=r fo-=o     "disable continuation of comments

" NERDTree
" autocmd VimEnter * NERDTree
" let NERDTreeWinPos='left'


""""""""""""""""""""""""""""""""""
" Taglist configuration
""""""""""""""""""""""""""""""""""
let Tlist_Auto_Open=1
let Tlist_Exit_OnlyWindow = 1          "如果taglist窗口是最后一个窗口,则退出vim

" cscope
if filereadable("cscope.out")
    cs add cscope.out
endif

" auto save
" let g:auto_save = 1  " enable AutoSave on Vim startup
" let g:auto_save_events = ["InsertLeave", "TextChanged", "TextChangedI", "CursorHoldI", "CompleteDone"]
" let g:auto_save_postsave_hook = '!ctags -R' " will run :TagsGenerate after each save
autocmd TextChanged,TextChangedI * silent write
2. 主题安装
这里,GitHub - Collection of awesome color schemes for Neo/vim,收集了一些Vim主题,进入相应的主题。用git clone下载主题到/opt/vim_runtime/sources_forked/目录下,举例:
ubuntu@VM-8-13-ubuntu:/opt/vim_runtime/sources_forked$ sudo git clone https://github.com/danilo-augusto/vim-afterglow.git
Cloning into 'vim-afterglow'...
remote: Enumerating objects: 159, done.
remote: Counting objects: 100% (5/5), done.
remote: Compressing objects: 100% (4/4), done.
remote: Total 159 (delta 0), reused 2 (delta 0), pack-reused 154
Receiving objects: 100% (159/159), 50.17 KiB | 43.00 KiB/s, done.
Resolving deltas: 100% (55/55), done.
将配置添加到my_configs.vim末尾,
colorscheme afterglow
3. 插件安装
3.1 Vim插件管理器
Vim插件管理器有很多,如vim-plug,Vundle,Pathogen。简单了解了下,推荐更多的是vim-plug。
(1)Pathogen
vimrc已经预装了Pathogen,
(2)安装vim-plug
安装vim-plug,
curl -fLo /opt/vim_runtime/autoload/plug.vim --create-dirs https://raw.githubusercontent.com/junegunn/vim-plug/master/plug.vim
将要安装的插件以下列的格式添加到Vim配置文件/opt/vim_runtime/my_config.vim,
call plug#begin('sources_forked')
" The default plugin directory will be as follows:
"   - Vim (Linux/macOS): '~/.vim/plugged'
" You can specify a custom plugin directory by passing it as the argument
"   - e.g. `call plug#begin('~/.vim/plugged')`
"   - Avoid using standard Vim directory names like 'plugin'

" Make sure you use single quotes

Plug 'ycm-core/YouCompleteMe', { 'do': './install.py --all' }

" Shorthand notation; fetches https://github.com/junegunn/vim-easy-align
Plug 'junegunn/vim-easy-align'

" Any valid git URL is allowed
Plug 'https://github.com/junegunn/vim-github-dashboard.git'

" Multiple Plug commands can be written in a single line using | separators
Plug 'SirVer/ultisnips' | Plug 'honza/vim-snippets'

" On-demand loading
Plug 'scrooloose/nerdtree', { 'on':  'NERDTreeToggle' }
Plug 'tpope/vim-fireplace', { 'for': 'clojure' }

" Using a non-default branch
Plug 'rdnetto/YCM-Generator', { 'branch': 'stable' }

" Using a tagged release; wildcard allowed (requires git 1.9.2 or above)
Plug 'fatih/vim-go', { 'tag': '*' }

" Plugin options
Plug 'nsf/gocode', { 'tag': 'v.20150303', 'rtp': 'vim' }

" Plugin outside ~/.vim/plugged with post-update hook
Plug 'junegunn/fzf', { 'dir': '~/.fzf', 'do': './install --all' }

" Unmanaged plugin (manually installed and updated)
Plug '~/my-prototype-plugin'

" Initialize plugin system
call plug#end()
:source my_configs.vim重新加载。用:PlugInstall安装插件。
3.2 YouCompleteMe
YouCompleteMe是一款Vim代码自动补全引擎。按官方文档安装,碰到好多问题。
(1)以root身份按官方文档安装
最开始我以ubuntu身份安装,遇到很多问题。
# Install CMake, Vim and Python
$ sudo apt install build-essential cmake vim-nox python3-dev

# Install mono-complete, go, node, java and npm
$ sudo apt install mono-complete golang nodejs default-jdk npm

# Compile YCM
$ git clone https://github.com/ycm-core/YouCompleteMe.git /opt/vim_runtime/sources_forked/YouCompleteMe
$ cd /opt/vim_runtime/sources_forked/YouCompleteMe
$ git submodule update --init --recursive
$ python3 install.py --all
(2)以ubuntu身份按官方文档安装
按官方文档,安装方法如下:
# Install CMake, Vim and Python
$ sudo apt install build-essential cmake vim-nox python3-dev

# Install mono-complete, go, node, java and npm
$ sudo apt install mono-complete golang nodejs default-jdk npm

# Compile YCM

$ git clone https://github.com/ycm-core/YouCompleteMe.git ~/.vim/bundle/YouCompleteMe
$ cd ~/.vim/bundle/YouCompleteMe
$ sudo git submodule update --init --recursive
$ python3 install.py --all
运行git submodule update --init --recursive,如果出现fatal: unable to access : Operation timed out,多试几次。
$ sudo git submodule update --init --recursive
Submodule 'third_party/ycmd' (https://github.com/ycm-core/ycmd) registered for path 'third_party/ycmd'
Cloning into '/home/ubuntu/.vim/bundle/YouCompleteMe/third_party/ycmd'...
fatal: unable to access 'https://github.com/ycm-core/ycmd/': Operation timed out after 300028 milliseconds with 0 out of 0 bytes received
fatal: clone of 'https://github.com/ycm-core/ycmd' into submodule path '/home/ubuntu/.vim/bundle/YouCompleteMe/third_party/ycmd' failed
Failed to clone 'third_party/ycmd'. Retry scheduled
卡在Cloning into '/home/ubuntu/.vim/bundle/YouCompleteMe/third_party/ycmd/third_party/mrab-regex'...不动,因为mrab-regex已经放到Bitbucket托管了,
$ cd third_party/ycmd/third_party/
$ sudo git clone https://bitbucket.org/mrabarnett/mrab-regex.git
运行python3 install.py --all,遇到如下问题:
CMake Error at /usr/share/cmake-3.16/Modules/ExternalProject.cmake:1706 (file):
  file problem creating directory:
  /home/ubuntu/.vim/bundle/YouCompleteMe/third_party/ycmd/cpp/absl
Call Stack (most recent call first):
  /usr/share/cmake-3.16/Modules/ExternalProject.cmake:3188 (_ep_set_directories)
  CMakeLists.txt:13 (ExternalProject_Add)
提示创建目录时出现问题,检查下cpp的权限,
4 drwxr-xr-x 6 root root 4096 Apr 20 00:02 cpp
cpp文件拥有者是root,权限是rwxr-xr-x,我用的是ubuntu登录,属于root组,因此,增加cpp组的写权限。
$ sudo chmod 777 cpp
再次运行python3 install.py --all,遇到如下问题:
-- Downloading libclang 13.0.0 from https://github.com/ycm-core/llvm/releases/download/13.0.0/libclang-13.0.0-x86_64-unknown-linux-gnu.tar.bz2
CMake Error at ycm/CMakeLists.txt:113 (file):
  file DOWNLOAD HASH mismatch
Clang下载出现问题,手动下载libclang至/third_party/ycmd/clang_archives/,
ubuntu@VM-8-13-ubuntu:~/.vim/bundle/YouCompleteMe/third_party/ycmd/clang_archives$ wget https://github.com/ycm-core/llvm/releases/download/13.0.0/libclang-13.0.0-x86_64-unknown-linux-gnu.tar.bz2
再次运行python3 install.py --all,又遇到问题,
cp: cannot create symbolic link '/home/ubuntu/.vim/bundle/YouCompleteMe/third_party/ycmd/cpp/../third_party/clang/lib/libclang.so': Permission denied
libclang.so共享文件(Shared Library file),在系统可能是不同的名称,查找下,
$ sudo find / -name "libclang.so*"
/usr/lib/llvm-9/lib/libclang.so.1
/usr/lib/llvm-10/lib/libclang.so.1
为libclang.so.1创建一个符号连接libclang.so,
$ cd /usr/lib/llvm-9/lib/
$ sudo ln -s libclang.so.1 libclang.so

$ cd /usr/lib/llvm-10/lib/
$ sudo ln -s libclang.so.1 libclang.so
还是不行,因为提示的是Permission denied,我想的是用root用户登录来运行,
root@VM-8-13-ubuntu:/home/ubuntu/.vim/bundle/YouCompleteMe# python3 install.py --all
Generating ycmd build configuration...OK
Compiling ycmd target: ycm_core...OK
Building regex module...OK
Building watchdog module...OK
Installing Omnisharp for C# support...FAILED with exception RemoteDisconnected: Remote end closed connection without response
既然是在支持C#时出错,我试着让YouCompleteMe只支持C家族语言。
python3 install.py --clangd-completer
(3)用apt-get insall安装
这个似乎也不行。
sudo apt install vim-youcompleteme
3.3 NERD Tree
NERD Tree是树状文件系统管理器。vimrc已经包含了NERD Tree,进行如下配置:
 92 * [ack.vim](https://github.com/mileszs/ack.vim): Vim plugin for `the_silver_searcher` (ag) or ack -- a wicked fast grep
  93 * [bufexplorer.zip](https://github.com/vim-scripts/bufexplorer.zip): Quickly and easily switch between buffers. This plugin can be opened with             `<leader+o>`
  94 * [ctrlp.vim](https://github.com/ctrlpvim/ctrlp.vim): Fuzzy file, buffer, mru and tag finder. It's mapped to `<Ctrl+F>`
  95 * [goyo.vim](https://github.com/junegunn/goyo.vim) and [vim-zenroom2](https://github.com/amix/vim-zenroom2):
  96 * [lightline.vim](https://github.com/itchyny/lightline.vim): A light and configurable statusline/tabline for Vim
  97 * [NERD Tree](https://github.com/preservim/nerdtree): A tree explorer plugin for vim
  98 * [open_file_under_cursor.vim](https://github.com/amix/open_file_under_cursor.vim): Open file under cursor when pressing `gf`
  99 * [pathogen.vim](https://github.com/tpope/vim-pathogen): Manage your vim runtimepath
 100 * [snipmate.vim](https://github.com/garbas/vim-snipmate): snipmate.vim aims to be a concise vim script that implements some of TextMate's snippets         features in Vim
 101 * [ale](https://github.com/dense-analysis/ale): Syntax and lint checking for vim (ALE requires NeoVim >= 0.2.0 or Vim 8 with +timers +job +channel)
 102 * [vim-commentary](https://github.com/tpope/vim-commentary): Comment stuff out.  Use `gcc` to comment out a line (takes a count), `gc` to comment out      the target of a motion. `gcu` uncomments a set of adjacent commented lines.
 103 * [vim-expand-region](https://github.com/terryma/vim-expand-region): Allows you to visually select increasingly larger regions of text using the same      key combination
 104 * [vim-fugitive](https://github.com/tpope/vim-fugitive): A Git wrapper so awesome, it should be illegal
 105 * [vim-indent-object](https://github.com/michaeljsmith/vim-indent-object): Defines a new text object representing lines of code at the same indent         level. Useful for python/vim scripts
 106 * [vim-multiple-cursors](https://github.com/terryma/vim-multiple-cursors): Sublime Text style multiple selections for Vim, CTRL+N is remapped to CTRL+     S (due to YankRing)
 107 * [vim-yankstack](https://github.com/maxbrunsfeld/vim-yankstack): Maintains a history of previous yanks, changes and deletes
 108 * [vim-zenroom2](https://github.com/amix/vim-zenroom2) Remove all clutter and focus only on the essential. Similar to iA Writer or Write Room
 109 * [gist-vim](https://github.com/mattn/gist-vim) Easily create gists from Vim using the `:Gist` command
 110 * [vim-indent-guides](https://github.com/nathanaelkane/vim-indent-guides) Is a plugin for visually displaying indent levels in Vim
 111 * [editorconfig-vim](https://github.com/editorconfig/editorconfig-vim) EditorConfig helps maintain consistent coding styles for multiple developers        working on the same project across various editors and IDEs.
3.4 TagList + Cscope
Taglist是基于Ctags。Ctags记录源码中所有标识符定义所在的文件与行号。Taglist显示当前文件的代码结构,包括函数、类、宏定义等。Cscope比Ctags更强大,还记录了函数之间的调用关系与文件的包含关系。
(1)安装Ctags
直接用命令apt install universal-ctags进行安装。
sudo apt install universal-ctags
手动编译安装:
 $ git clone https://github.com/universal-ctags/ctags.git
 $ cd ctags
 $ ./autogen.sh
 $ ./configure --prefix=/where/you/want # defaults to /usr/local
 $ make
 $ make install # may require extra privileges depending on where to install
(2)安装TagList
从这里taglist.vim : vim online下载TagList到/opt/vim_runtime/sources_forked/(发现放到my_plugins不行,于是放到sources_forked目录下)。
(3)安装Cscope
安装Cscope,
sudo apt-get install cscope
生成索引文件,
$ cscope -Rbkq
添加索引文件,在my_configs.vim中添加,
" cscope
if filereadable("cscope.out")
    cs add cscope.out
endif
3.5 Tagbar
Tagbar,一个Vim插件,显示当前文件的标签和代码结构。

安装Tagbar,
root@ubuntu:/opt/vim_runtime/sources_forked# git clone https://github.com/preservim/tagbar.git
在my_configs.vim添加如下配置,
nmap <F8> :TagbarToggle<CR>   " 设置快捷键
let g:tagbar_width = 40       " 设置宽度,默认为40
autocmd VimEnter * nested :call tagbar#autoopen(1)    " 打开vim时自动打开tagbar
let g:tagbar_left = 1         " 在左侧
3.6 折叠
folding提供6种折叠方法:
manual          manually define folds
indent          more indent means a higher fold level
expr            specify an expression to define folds
syntax          folds defined by syntax highlighting
diff            folds for unchanged text
marker          folds defined by markers in the text
在my_configs.vim添加如下配置,
set foldmethod=indent
set foldcolumn=n    " 用n个-+表示折叠的内容
set foldlevel=2
3.7 运行Shell命令
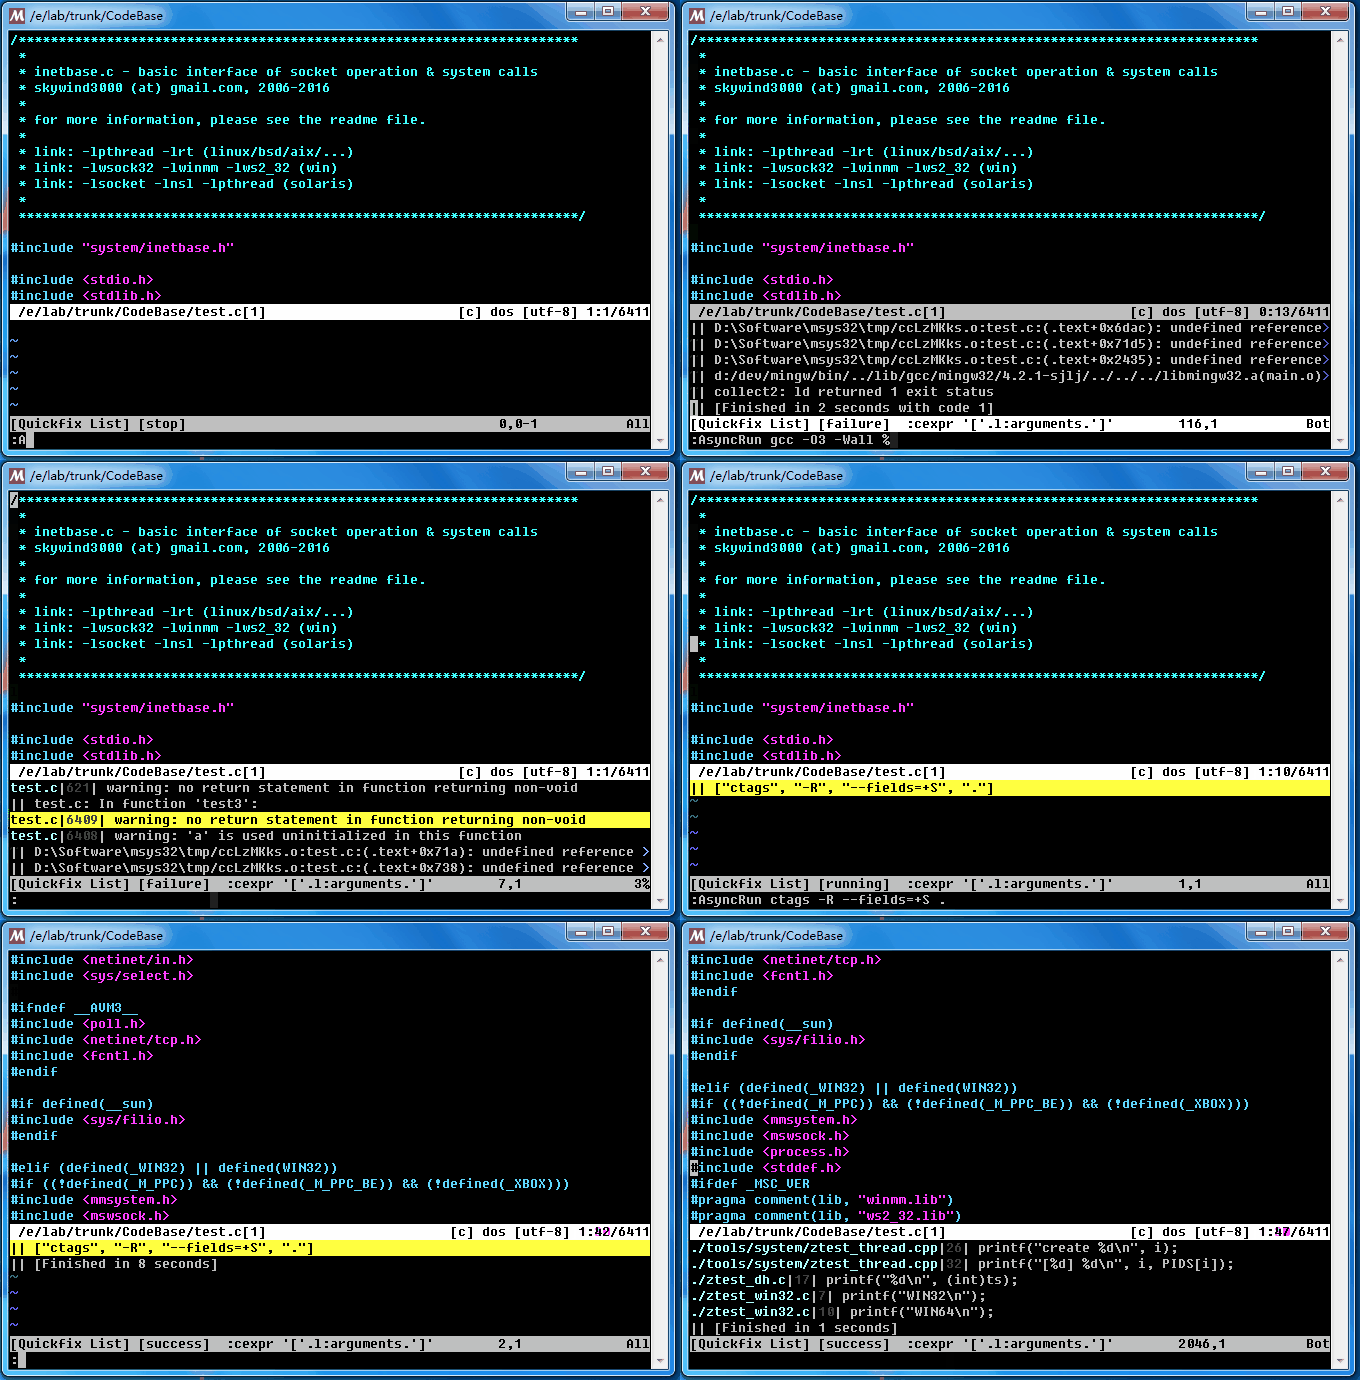
原生Vim,用:! cmd在Vim运行Shell命令。插件asyncrun.vim更加强大,异步运行Shell命令并实时输出到Quickfix窗口。
安装Asyncrun,将插件下载到/opt/vim_runtime/sources_forked/,
cd /opt/vim_runtime/sources_forked/
git clone https://github.com/skywind3000/asyncrun.vim.git

4. 遇到问题
(1)运行git clone卡住了
有一年使用CentOS,在运行sudo git clone ...卡住了,一直不往下走。最后我的做法是,从GitHub下载.zip源码包,使用scp命令将压缩文件上传到CentOS。解压之后,运行如下命令:
# Make sure all users have read access to /opt/vim_runtime
4 drwxr-xr-x  8 root root 4096 Mar 12 21:49 vim_runtime

$ sh /opt/vim_runtime/install_awesome_parameterized.sh /opt/vim_runtime --all
Installed the Ultimate Vim configuration for user baominghua successfully! Enjoy :-)
Installed the Ultimate Vim configuration for user cainanting successfully! Enjoy :-)
...
参考资料:
[1] Vim Awesome